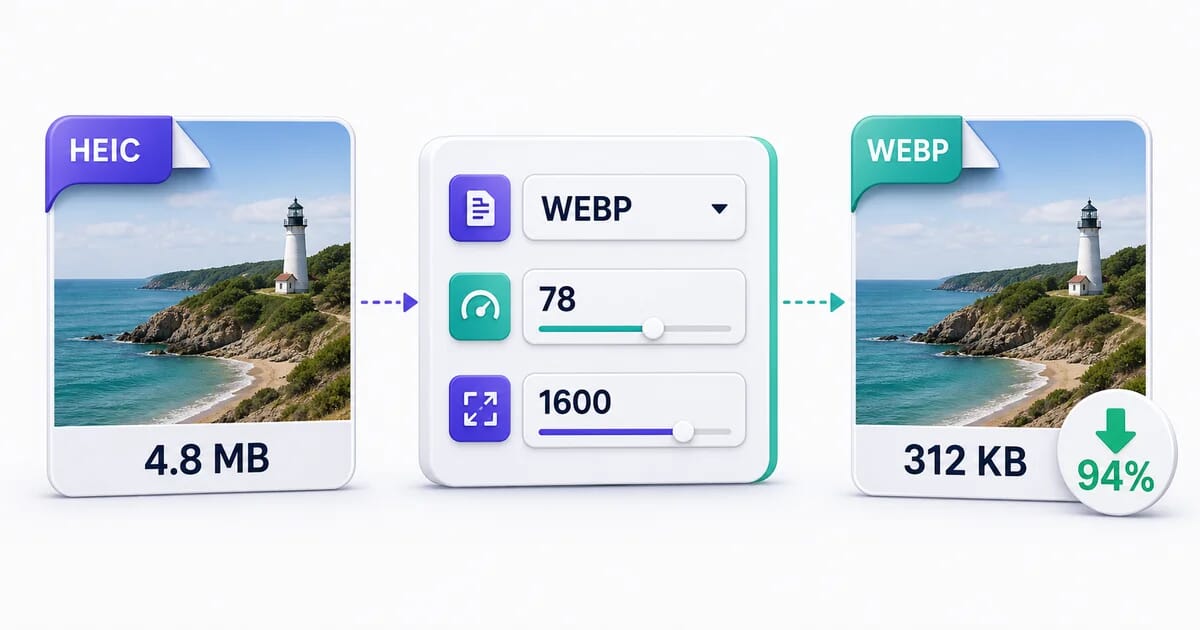
Free Online Image Converter
Upload JPG, PNG, WebP, AVIF, GIF, or HEIC. Download JPG, PNG, WebP, AVIF, or GIF — no signup required.
Drop one image file here
or click to choose · up to 50 MB
Files are uploaded to Sirv for processing. Do not upload confidential or sensitive images.
Supported Format Conversions
Why Convert Image Formats?
Image format conversion is essential for web performance, compatibility, and storage optimization. Different formats serve different purposes:
- Reduce file size — Converting PNG to WebP or AVIF can reduce file sizes by 25-50% without visible quality loss, making pages load faster.
- Add transparency — Need transparency in your image? Convert JPEG to PNG or WebP to add an alpha channel.
- Improve compatibility — Some systems don't support modern formats. Convert AVIF or WebP to JPEG or PNG for universal support.
- Enable animation — Convert static images to GIF or animated WebP for simple animations and motion graphics.
- Optimize for web — Modern formats like WebP and AVIF are designed specifically for web delivery with superior compression.
- Convert iPhone photos — iPhones save photos in HEIC format by default. Convert HEIC to JPG or PNG for universal sharing and editing.
Supported Formats
HEIC
Apple's default iPhone photo format with excellent compression
Input only; HEIC is not offered as an output.
How Image Conversion Works
When you convert an image from one format to another, the converter decodes the source image into raw pixel data, then re-encodes it using the target format's compression algorithm. Here's what happens during conversion:
Lossy vs. Lossless Conversion
Lossy formats (JPEG, WebP lossy, AVIF lossy) discard some image data to achieve smaller file sizes. Each time you convert between lossy formats, you may lose additional quality — this is called generation loss. For best results, always convert from the original source file. Learn more in our guide to image compression.
Lossless formats (PNG, WebP lossless, GIF) preserve all image data. Converting between lossless formats maintains perfect quality, though file sizes may vary based on each format's compression efficiency.
What Gets Preserved
- Pixel data — The actual image content is preserved (within the limits of the target format)
- Dimensions — Width and height remain unchanged
- Color profile — Most formats preserve ICC color profiles
What May Change
- Transparency — JPEG doesn't support transparency, so alpha channels are flattened
- Color depth — GIF is limited to 256 colors
- Metadata — EXIF data may not transfer between all formats
- Animation — Only GIF, WebP, and AVIF support animation
Best Format for Your Use Case
Photographs and Complex Images
Use WebP or AVIF for web, JPEG for universal compatibility.
These formats excel at compressing photographic content with millions of colors and smooth gradients.
Compare modern formats →Logos, Icons, and Graphics
Use SVG for vector graphics, PNG or WebP for raster graphics with transparency.
These formats preserve sharp edges and support transparency for overlaying on any background.
SVG best practices →Screenshots and Text-Heavy Images
Use PNG for lossless quality, WebP lossless for smaller files.
Lossless compression prevents artifacts around text and UI elements.
PNG optimization guide →Simple Animations
Use WebP or AVIF for smaller files, GIF for maximum compatibility.
Modern animated formats are 50-90% smaller than GIF while supporting more colors.
Replace GIFs with modern formats →E-commerce Product Images
Use WebP with JPEG fallback, or AVIF for cutting-edge optimization.
Fast-loading product images directly impact conversion rates and SEO rankings.
E-commerce image guide →Frequently Asked Questions
Is this image converter free?
Can I convert HEIC to JPG?
How do I convert PNG to JPG?
What's the maximum file size?
Are my images stored on your server?
Which format should I convert to for websites?
Will converting my image reduce quality?
Can I convert multiple images at once?
What's the difference between WebP and AVIF?
Popular Conversions
Convert by Input Format
Convert from JPG
Convert from PNG
Convert from WebP
Convert from AVIF
Convert from GIF
Convert from HEIC
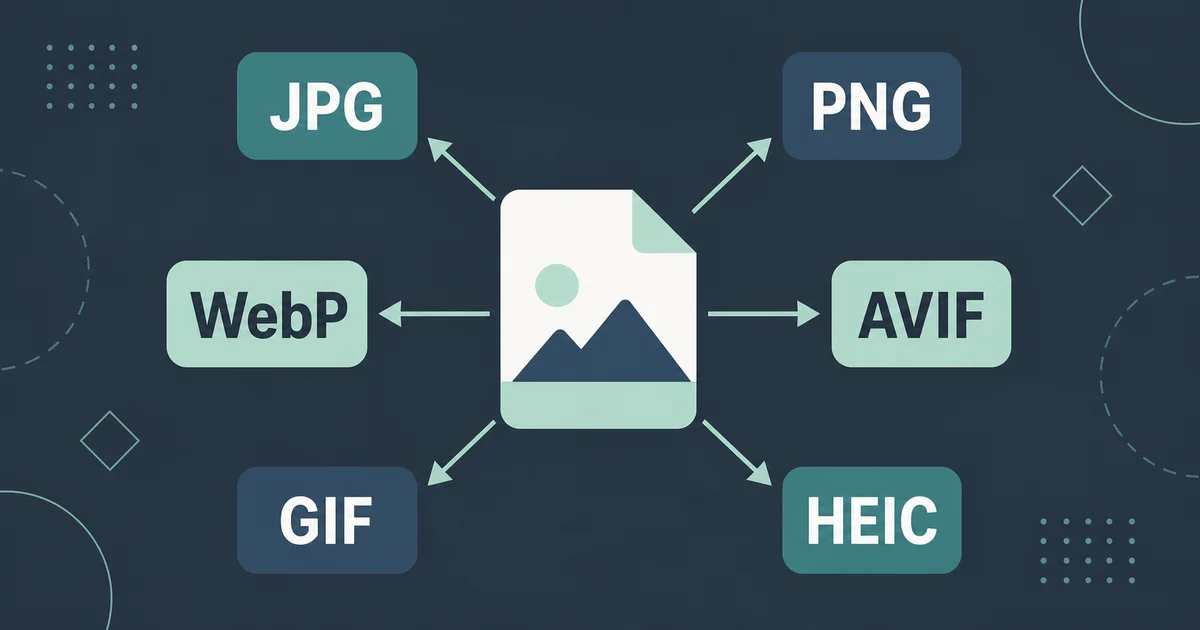
How to Change Image Format: The Complete Convert Image Format Guide
Change image format the right way: pick a target for photos, screenshots, logos or animation, avoid generation loss, and batch-convert safely.
Change an image format by re-encoding it: OS built-ins for one file, ImageMagick mogrify for a folder, sharp or Pillow in code. Match the format to the job — JPG/WebP/AVIF for photos, PNG for graphics and screenshots, SVG for logos.
Every “convert image format” question hides two smaller questions: which format should this image be, and how do I change it without making it worse. Most bad conversions fail on the first question (a logo saved as JPG gets fuzzy edges) or the second (a photo re-saved five times turns into mush). This guide answers both.
It is the hub for every conversion on this site. Start here to pick the target format, then follow the links to the specific step-by-step guide for your exact conversion. If you want a tool-by-tool comparison instead of a decision framework, read 12 Image Converters Compared.
The 60-Second Decision Table
Before you touch any image file converter, decide what kind of image you have. The content type almost always dictates the format:
| Content type | Convert to | Why | Avoid |
|---|---|---|---|
| Photograph | JPG or WebP | Lossy compression suits continuous tones; smallest files at good quality | GIF, BMP |
| Screenshot or UI capture | PNG or WebP lossless | Sharp text and flat colors stay crisp | JPG (text gets ringing artifacts) |
| Logo or icon with flat colors | SVG if vector exists, else PNG | Scales forever as SVG; PNG keeps hard edges | JPG (white halos around edges) |
| Logo or illustration (raster only, gradients) | PNG-24 or WebP lossless | Full color depth, alpha transparency preserved | GIF (256-color ceiling) |
| Animation | GIF for compatibility, WebP/AVIF for size | GIF plays everywhere; WebP is typically much smaller | APNG if you need old-Safari support |
| Image needing transparency | PNG, WebP or AVIF | All support an alpha channel | JPG (no transparency at all) |
| Camera raw / editing master | TIFF or keep the RAW | Lossless working copy, wide gamut | Any lossy format as your master |
| Print handoff | TIFF or high-quality PDF | Printers expect lossless and embedded profiles | WebP (patchy print-pipeline support) |
| Maximum web performance | AVIF or WebP | Best compression per byte on the modern web | BMP, TIFF (enormous on a page) |
Two rules cover most mistakes:
- Text, flat color, hard edges → lossless (PNG, WebP lossless).
- Photographs → lossy (JPG, WebP, AVIF) unless the file must survive repeated editing.
If you only remember the table and these two rules, you will pick correctly the vast majority of the time. The rest of this guide explains why, and how to execute the change cleanly.
What Actually Changes When You Convert
A file extension is not the image. The image is an array of pixels plus a description of how those pixels are encoded. When you change image format, you keep the pixels and replace the encoding:
- The pixel values stay the same — unless the new format forces a change, such as GIF’s 256-color palette or a lossy encoder’s quantization.
- The compression algorithm changes. JPG uses DCT block coding, PNG uses DEFLATE on filtered scanlines, WebP uses VP8 prediction, AVIF uses AV1. Each has different strengths.
- Features may be dropped or added. Alpha transparency, animation, color depth, progressive loading, and EXIF storage all vary by format.
This is why a “conversion” between two lossless formats of the same color depth (PNG to lossless WebP, say) can be perfectly reversible: same pixels, new container. But a conversion into a lossy format (anything to JPG at quality 80) discards information permanently.
The one asymmetry you must internalize
Lossy → lossless never recovers quality. Converting a JPG to PNG or TIFF produces a larger file with exactly the same flaws — block artifacts, color banding, mosquito noise around text — now frozen into a “clean” lossless container. The file gets bigger, not better.
| Direction | What happens |
|---|---|
| Lossless → lossless | Pixels preserved. Safe, reversible in principle. |
| Lossless → lossy | Quality drops by design. Fine if the quality setting is high enough for the content. |
| Lossy → lossless | Nothing improves. Artifacts are preserved forever, file size grows. Almost always a mistake. |
| Lossy → lossy | Quality drops again. Each pass compounds. See generation loss below. |
The practical consequence: your conversion pipeline should always flow from the highest-quality source you have. Convert from the original camera file or the original PNG export — not from a JPG someone emailed you.
Generation Loss: Always Convert From the Original
Every pass through a lossy encoder re-quantizes the image. The first JPG save might cost a little quality. Saving that JPG as a new JPG costs more, because the encoder now treats existing artifacts as image detail and encodes them too. After four or five generations, photos develop a soft, smeared look and visible blocking that no single pass would explain.
Rules that prevent generation loss:
- Keep a lossless master. RAW, TIFF, or PNG. All web and social deliverables derive from it.
- Never edit a JPG, re-save, repeat. Each save re-encodes. Edit the master, export fresh.
- Chain conversions through lossless intermediates. HEIC to JPG to PNG? Do HEIC to PNG directly, or HEIC to TIFF to PNG. Never HEIC to JPG (quality 75) to PNG.
- One lossy export per destination. A photo gets one JPG export for the web, one for print — both from the master.
A quick diagnostic for images you receive: if a “PNG” shows JPG-style block artifacts, someone converted a JPG to PNG somewhere upstream. The pixels are already damaged; converting again will not help. Ask for the original.
Change Picture Format With What You Already Have
You do not always need to install anything. Every major OS ships a working image file converter.
macOS
Preview handles most single-file conversions:
- Open the image in Preview.
- File → Export (not Save).
- Pick the format: HEIC, JPEG, PDF, TIFF, PNG.
- For JPEG, drag the Quality slider — around 80% is a typical sweet spot for photos.
- Click Save.
For batch work on a Mac, Automator’s “Change Type of Images” action converts a whole folder, or you can drop to the command line with sips:
# One file
sips -s format jpeg photo.png --out photo.jpg

# Every PNG in a folder
for f in *.png; do sips -s format jpeg "$f" --out "${f%.png}.jpg"; done
Windows
- Paint: open the file, File → Save As, pick PNG, JPEG, BMP, GIF or TIFF. Crude but reliable.
- Photos app: Edit → Save As offers JPG, PNG, TIFF, BMP, HEIC.
- PowerToys: Image Resizer resizes from Explorer’s right-click menu; pair it with a converter for format changes at scale.
Linux
Desktop image viewers (Eye of GNOME, gThumb, Gwenview) export between common formats. But on Linux the honest answer is: use ImageMagick, covered next. It is one package install and does everything the GUI tools do, in bulk.
Phones
iOS converts automatically: sharing a HEIC photo to most apps produces a compatible JPG. Android’s built-in editor saves as JPG or PNG. For anything beyond a single photo, use a web converter or move the files to a computer.
Bulk Conversion With ImageMagick
ImageMagick is the reference command-line image file converter. Install it once (brew install imagemagick, sudo apt install imagemagick, or the Windows installer) and you can change picture format for one file or ten thousand.
Single file:
# Convert and set quality (JPG/WebP: 1-100, ~80 is typical for photos)
magick input.png -quality 82 output.jpg

# Force background instead of transparency (JPG has no alpha)
magick logo.png -background white -flatten logo.jpg
Batch convert a whole folder with mogrify:
# Every PNG in the current directory becomes a JPG, written alongside the original
mogrify -format jpg *.png

# Same, but set quality and flatten transparency onto white
mogrify -format jpg -quality 82 -background white -flatten *.png
Two mogrify cautions:
mogrifymodifies in place by default. Always run it on copies, or in a git-tracked directory, or with-path output/to write elsewhere:
mogrify -format webp -path converted/ *.png-flattenwith a background matters more than people expect. Converting a transparent PNG straight to JPG fills transparency with black in many builds. Always specify-background white(or your page background color) when the destination is JPG.
For thousands of files, ImageMagick is not the fastest engine — libvips is typically several times faster — but it is installed everywhere, documented exhaustively, and fast enough for most real jobs. See the converters comparison for the speed data.
Programmatic Conversion: sharp and Pillow
When conversions belong in a build step or a backend, use the two standard libraries.
sharp (Node.js)
sharp wraps libvips and is the default choice for Node pipelines and most JavaScript image tooling:
import sharp from "sharp";

// PNG to WebP, quality 80
await sharp("input.png").webp({ quality: 80 }).toFile("output.webp");

// Photo to JPG with white background (flattens transparency)
await sharp("logo.png")
  .flatten({ background: "#ffffff" })
  .jpeg({ quality: 82, mozjpeg: true })
  .toFile("logo.jpg");
Pillow (Python)
from PIL import Image

# Simple format change
img = Image.open("input.png")
img.save("output.jpg", quality=82)

# Flatten transparency before saving as JPG
bg = Image.new("RGB", img.size, (255, 255, 255))
if img.mode in ("RGBA", "LA", "P"):
    img = img.convert("RGBA")
    bg.paste(img, mask=img.split()[3])
bg.save("output.jpg", quality=82)
Both libraries preserve the discipline from earlier sections: convert from the original, flatten deliberately, set quality explicitly. A build pipeline that runs on every deploy should read lossless sources and emit lossy deliverables exactly once.
Metadata and Color Profiles: The Silent Conversion Bugs
Pixels are half the file. The other half is metadata, and conversions routinely mangle it.
EXIF and GPS data. Cameras embed orientation, timestamp, camera model and sometimes GPS coordinates. Two rules:
- Orientation: a photo can rely on an EXIF flag to say “display rotated.” Some converters bake the rotation into pixels and drop the flag; others drop the flag without rotating. The result is a sideways image. After converting photos, spot-check orientation.
- Privacy: publishing images with GPS intact leaks locations. Converting is a good moment to strip metadata — ImageMagick’s
-strip, sharp by default (it discards most metadata unless you opt in), Pillow withexif=omitted.
ICC color profiles. A wide-gamut photo (Display P3) converted without its profile gets interpreted as sRGB, and colors shift — typically muted reds and greens. When converting, carry the profile across (magick in.png -profile sRGB.icc out.jpg when you want a forced transform; otherwise ImageMagick preserves embedded profiles automatically). For the deep background, see color spaces and profiles for the web.
The safe default: preserve EXIF orientation (or bake it in correctly), strip GPS and personal metadata for anything public, and never let a converter silently assume sRGB for a profiled image.
Format Quick Reference
One-liner conversions for the eight formats that cover nearly every request. Commands use ImageMagick; the principles transfer to any tool.
| Target | One-liner | Notes |
|---|---|---|
| JPG | magick in.png -background white -flatten -quality 82 out.jpg | Flatten transparency; ~80-85 quality suits photos |
| PNG | magick in.jpg out.png | Bigger file, same flaws — see lossy→lossless above |
| WebP (lossy) | magick in.jpg -quality 80 out.webp | Typically 25-35% smaller than JPG at matched quality |
| WebP (lossless) | magick in.png -define webp:lossless=true out.webp | For screenshots and graphics |
| AVIF | magick in.jpg -quality 50 out.avif | AVIF quality scales differently; ~50 is a common starting point |
| GIF | magick in.png -colors 256 out.gif | Palette-limited; fine for simple graphics, bad for photos |
| HEIC | magick in.jpg -quality 80 out.heic | Needs libheif support compiled in; common on Apple-centric pipelines |
| TIFF | magick in.jpg -compress lzw out.tiff | Lossless working format for print and editing |
Format-specific guidance worth reading before you commit:
- WebP — 8 Ways to Convert Images to WebP in Bulk and the complete WebP guide.
- PNG — the PNG converter guide and PNG optimization and transparency.
- JPG as the universal target — how to convert any image to JPG, plus PNG to JPG and the difference between JPG and JPEG.
- HEIC — HEIC to JPG for the iPhone-photo pipeline and the HEIC/HEIF web guide.
- Modernization — moving GIF to modern formats and WebP to PNG/JPG for fallbacks.
- Beyond raster — RAW to JPEG for camera files, PDF to image for documents, image to vector for tracing, and PNG to favicon/ICO.
Which Target Format, One More Time
Condensing everything above into a final checklist you can run before any conversion:
- What is the content? Photo → JPG/WebP/AVIF. Screenshot, text, flat graphics → PNG or lossless WebP. Animation → GIF (compatibility) or WebP/AVIF (size). Logo → SVG if a vector exists, else PNG.
- Does it need transparency? Then JPG is out. PNG, WebP or AVIF.
- Where will it live? Web → WebP/AVIF with JPG/PNG fallbacks. Print → TIFF or PDF. Editing master → TIFF or RAW.
- What is the source? Always the highest-quality file you have. If the source is already lossy, do not bother converting to lossless.
- Convert once, from the master. No chains through lossy intermediates.
Serving Converted Images Without a Pipeline
If you run a website and the thought of maintaining conversion scripts makes you tired, there is a middle path: upload your originals once and let the delivery layer negotiate formats per browser. A modern image CDN serves WebP or AVIF to browsers that support them and JPG elsewhere, from a single source file — no build step, no folder of variants.
This is how most image-heavy sites operate in practice. You keep masters, the CDN handles the any-to-any conversion at the edge, and caching makes the cost a one-time event per image. Sirv does exactly this, and pairs format negotiation with zoomable galleries, 360 spins and video through the Sirv Media Viewer — useful when product images need more than static display. For image cleanup before upload, Sirv Studio handles background removal and AI editing in the browser.
The pattern that works for teams: masters in one place, conversions delegated, humans deciding only the target format questions from the table at the top of this guide. You can create a Sirv account and point it at your existing images to see the negotiation in action.
Recap
- To convert image format correctly, first pick the target by content type: photos get lossy formats, text and flat graphics get lossless, logos get SVG or PNG, animations get GIF or WebP.
- Conversion changes encoding, not pixels — and lossy-to-lossless conversion never improves anything.
- Generation loss is real: convert from originals, never chain through lossy intermediates, one lossy export per destination.
- OS built-ins cover single files; ImageMagick
mogrifycovers folders; sharp and Pillow cover pipelines. - Handle metadata deliberately: preserve orientation and color profiles, strip GPS for public files.
- For websites, consider letting an image CDN negotiate formats per browser instead of maintaining conversion output yourself.
Pick the target from the decision table, follow the linked guide for your exact conversion, and keep your masters safe. That is the whole discipline.
Sources
Related Guides
Complete WebP Guide
Everything about WebP: encoding, browser support, and implementation.
Complete AVIF Guide
Master the next-generation image format with superior compression.
JPEG Optimization Mastery
Squeeze every byte from JPEG while maintaining quality.
Understanding Image Compression
How lossy and lossless compression actually work.
Responsive Images Guide
Serve the right image size to every device with srcset and sizes.
HEIC/HEIF Web Guide
Convert and work with Apple's HEIC format for web compatibility.
Image Conversion Tips
Start with the highest quality source
Always convert from your original, highest-quality image. Converting a compressed JPEG to WebP won't recover lost quality — it will only compound the compression artifacts. If possible, start from RAW, TIFF, or high-quality PNG files.
Choose the right format for the content
Don't blindly convert everything to one format. Photographs compress well with lossy formats (WebP, AVIF, JPEG). Graphics with flat colors and text need lossless formats (PNG, lossless WebP) to avoid artifacts.
Consider your audience's browsers
Check browser support before committing to a format. WebP works in all modern browsers. AVIF is catching up but may not work for all users yet. When in doubt, provide fallbacks.
Test before deploying
Always visually compare converted images against originals at 100% zoom. Some images may show artifacts at certain compression levels that aren't visible in thumbnails.
Automate for production
For websites with many images, manual conversion doesn't scale. Use build tools, image CDNs like Sirv, or server-side processing to convert images automatically based on browser support.