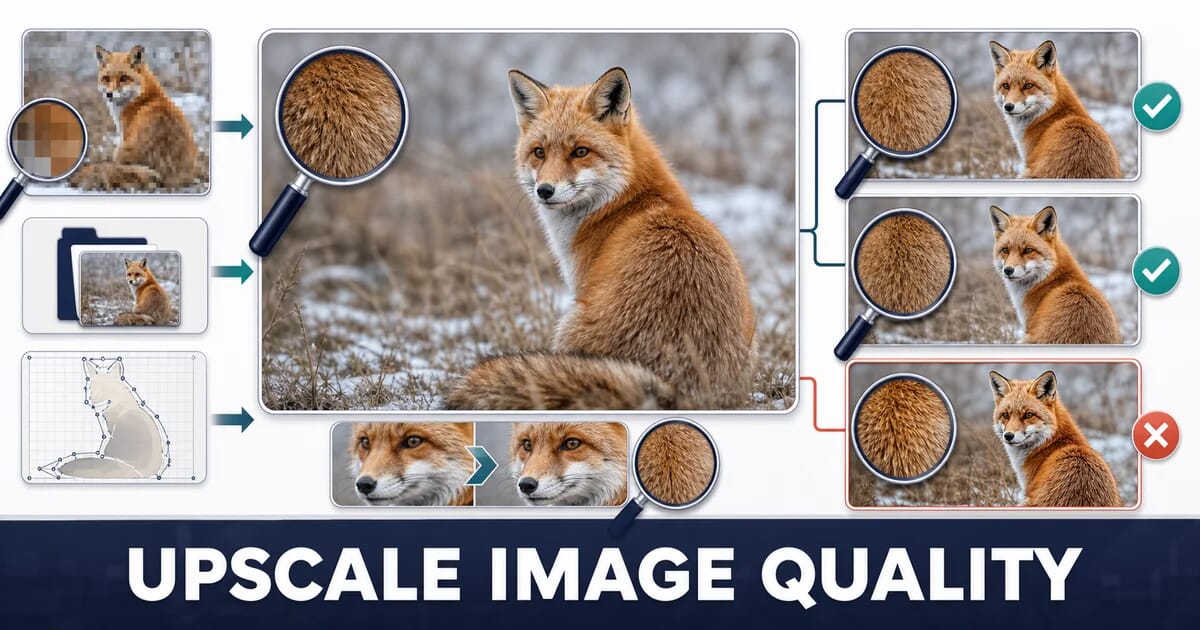
7 Ways to Upscale an Image Without Making It Look Fake
Upscale an image honestly: find the real original, try Lanczos with sharpening, Real-ESRGAN or waifu2x - and know when upscaling cannot help.
Disclosure: ImageGuide is published by Sirv, an image CDN company. This guide mentions Sirv products. Read how we write these guides.
Quick answer
Upscaling creates more pixels through interpolation or generated detail. It can improve presentation at a larger size, but it cannot prove what missing source detail originally looked like. Start with the best original, resize only as far as necessary, and inspect faces, text, product markings, and repeated textures.
Reference for this answer: Sharp output documentation.
Upscaling cannot recover detail that was never captured. Every method on this list either interpolates between the pixels you have, or invents plausible new ones. Neither is recovery.
That is not a reason to avoid upscaling. It is a reason to pick the method that matches how much invention your use case can tolerate. A wallpaper can tolerate a lot. A product photo can tolerate almost none.
Set Expectations First
| Scale | Classic resampling | AI upscaling |
|---|---|---|
| 1.5× | Very good | Excellent |
| 2× | Acceptable, needs sharpening | Very good |
| 4× | Visibly soft | Good on some content |
| 8× | Unusable | Invented, not enhanced |
The honest rule: 2× is a safe ceiling for anything that must be truthful. Beyond that you are generating an image that resembles the original rather than enlarging it.
What Cannot Be Recovered
- Text that was never legible stays illegible, or becomes confidently wrong letters
- A face too small to show features gets a face the model invented
- A pattern below the sampling limit gets a plausible different pattern
- Heavy JPEG artifacts get sharpened into permanent structure
1. Find the Real Original
The highest-value method, and it costs nothing.
Almost every low-resolution image on the internet is a derivative. The full-size version usually still exists somewhere.
| Where to look | Why it works |
|---|---|
| The photographer or agency | They keep RAW and full-size masters |
| Your own DAM, Drive, or Dropbox | The web-sized copy was derived from something |
| The CMS media library | Many CMSs keep the original alongside the thumbnails |
| The brand’s press or media page | Companies publish full-resolution assets |
| Email threads from the original project | Attachments are often the master |
| Reverse image search | Finds larger copies of the same image elsewhere |
Check the CMS Trick
Many platforms expose the original by removing the size suffix from the URL:
https://example.com/wp-content/uploads/2026/03/product-300x200.jpg   ← thumbnail
https://example.com/wp-content/uploads/2026/03/product.jpg           ← original
# Does the unsuffixed original exist?
curl -sI "https://example.com/wp-content/uploads/2026/03/product.jpg" | head -1Ten minutes here beats any upscaler. Try it before anything else on this list.
2. Classic Resampling With Output Sharpening
For modest enlargements, a good resampling filter plus a light sharpen is genuinely sufficient, and it invents nothing.
Choose the Filter
| Filter | Behaviour |
|---|---|
| Lanczos | Sharpest; slight ringing on hard edges |
| Mitchell | Gentler, less ringing |
| Catmull-Rom | Between the two |
| Bicubic Smoother | Photoshop’s enlargement default |
| Nearest neighbour | Pixel art only |
# 2× with Lanczos, then light unsharp mask
magick photo.jpg -filter Lanczos -resize 200% \
  -unsharp 0x0.75+0.75+0.008 -quality 90 upscaled.jpg

# Gentler on portraits, where Lanczos ringing shows on skin
magick photo.jpg -filter Mitchell -resize 200% \
  -unsharp 0x0.6+0.6+0.01 -quality 90 upscaled.jpg
// Sharp
sharp('photo.jpg')
.resize({ width: 2400, kernel: 'lanczos3' })
.sharpen({ sigma: 0.8, m1: 0.5, m2: 2 })
.jpeg({ quality: 90, mozjpeg: true })
.toFile('upscaled.jpg');Sharpen After, Never Before
Sharpening before enlargement amplifies artifacts that the resample then spreads across more pixels. The order is always resize, then sharpen, then encode.
Clean the Source First
If the source is a compressed JPEG, remove the block artifacts before enlarging them:
magick photo.jpg -despeckle -filter Lanczos -resize 200% \
  -unsharp 0x0.75+0.75+0.008 clean-upscaled.jpg
3. Real-ESRGAN
Free, open source, runs locally. The current default for AI upscaling of photographs, and it does not upload anything.
# Portable binary, no Python setup required
./realesrgan-ncnn-vulkan -i input.jpg -o output.png -s 4

# Model tuned for real-world photos with compression artifacts
./realesrgan-ncnn-vulkan -i input.jpg -o output.png -n realesrgan-x4plus

# Model tuned for illustration and anime line art
./realesrgan-ncnn-vulkan -i art.png -o out.png -n realesrgan-x4plus-anime

# Whole folder
./realesrgan-ncnn-vulkan -i input_dir/ -o output_dir/ -s 4
Choosing the Model
| Model | Best for |
|---|---|
realesrgan-x4plus | Photographs, including compressed ones |
realesrgan-x4plus-anime | Illustration, line art, flat colour |
realesr-animevideov3 | Animated frames |
Using the anime model on a photograph produces a plasticky, over-smoothed result. Using the photo model on line art leaves the edges soft. The model choice matters more than the scale factor.
Downscale After Upscaling
Real-ESRGAN’s fixed 4× is often more than you need. Upscale 4×, then resample down to your target. The two-step result is usually cleaner than a direct 2×:
./realesrgan-ncnn-vulkan -i input.jpg -o big.png -s 4
magick big.png -filter Lanczos -resize 50% -quality 90 final.jpg
Prefer a desktop interface? Press provides local 4× upscaling on supported macOS and Linux x64 builds, writes a new result beside your other optimized outputs, and opens it against the source for a true 100% comparison.
4. waifu2x
Free, open source. Older than Real-ESRGAN and still the better choice for one specific job: illustration, line art, and flat-colour graphics.
waifu2x-ncnn-vulkan -i illustration.png -o out.png -s 2 -n 2-n is the denoise level, 0 to 3. On a clean PNG use 0 or 1. On a JPEG with visible artifacts use 2 or 3.
waifu2x preserves crisp line boundaries in a way photo-trained models do not, because it was trained on exactly that content. For a logo, a comic panel, a diagram, or a flat illustration, try it before Real-ESRGAN.
5. Commercial AI Upscalers
Paid tools add face-specific restoration, better handling of mixed content, batch queues, and a workflow that does not involve a terminal.
What You Are Paying For
| Capability | Why it matters |
|---|---|
| Face restoration models | Generic upscalers make faces uncanny |
| Automatic model selection | Mixed content in one image |
| Batch processing with presets | Catalogue work |
| Artifact removal tuned per source | Scans, screenshots, compressed JPEGs |
| No local GPU required | Works from a laptop |
For image workflows that are part of a product pipeline rather than a one-off, Sirv AI Studio covers upscaling alongside background removal and batch editing, and the Sirv Studio API exposes the same operations programmatically so ingest can normalise supplier images automatically.
Always Compare at 100%
Whatever tool you use, view the result at 100% zoom against the original before accepting it. Judge three things:
- Faces. Are the eyes and teeth real or invented?
- Text. Did any letters change identity?
- Texture. Does fabric, skin, or foliage look waxy?
The waxy look is the signature failure of over-applied AI upscaling, and it is very obvious once you know to look for it.
6. Re-Render From the Source
If the image was generated rather than photographed, upscaling is the wrong operation entirely. Regenerate it at the size you need.
| Asset type | Regenerate by |
|---|---|
| Logo, icon, chart | Export the SVG or source file at the target size |
| Screenshot | Retake it on a 2× display, or set deviceScaleFactor |
| 3D render | Re-render at higher resolution |
| Chart or graph | Re-plot from the data |
| Map | Re-export at the target zoom and size |
| Text-heavy graphic | Rebuild in HTML or a design tool |
Screenshots Specifically
Never upscale a screenshot. Text becomes mush, and no upscaler recovers letterforms reliably.
// Playwright: capture at 2× directly
const context = await browser.newContext({
  viewport: { width: 1280, height: 800 },
  deviceScaleFactor: 2,          // produces a 2560 × 1600 capture
});
const page = await context.newPage();
await page.goto('https://example.com');
await page.screenshot({ path: 'shot@2x.png' });
On macOS, set the display to a scaled resolution before capturing. On Windows, capture at 200% display scaling. The documentation screenshots guide covers the full workflow.
7. Avoid Needing It
The cheapest upscaling is the kind you never have to do.
Capture and Store Bigger Than You Serve
| Asset | Store at | Serve at |
|---|---|---|
| Product photo | 3000 × 3000 | 400–1600 px derivatives |
| Editorial photo | 2400 px long edge | 400–1600 px derivatives |
| Hero image | 2560 px wide | 600–1600 px derivatives |
| Screenshot | 2× the display size | 1× and 2× derivatives |
| Social campaign master | 2560 × 2560 | Every platform crop |
Storage is cheap. Reshooting is not.
Never Overwrite the Master
The most common cause of “we need to upscale this” is that someone optimised the original in place. Keep masters in a separate location, and derive everything from them.
masters/          ← never touched by the build, never optimised
  product-001.tif
public/images/    ← generated, disposable, regenerable
  product-001-400.avif
  product-001-800.avif
An image CDN makes this structural: you store the master and every derivative is produced on request. Sirv works this way, so the original is always available at full resolution. The 8 signs listicle covers when that is worth it.
When Upscaling Is the Wrong Answer
Four situations where you should refuse.
Product Photography
An upscaler invents texture. On a product photo, invented texture is a claim about the product. If the AI adds weave to a fabric or grain to a leather, you are showing a customer something that does not exist, and the return comes back as “not as pictured”.
Reshoot, or request a higher-resolution asset from the supplier.
Evidence, Records and Documents
Legal, medical, forensic, insurance, and identity contexts. An upscaled image is a reconstruction, not a record. A licence plate that “resolves” under an upscaler is a number the model guessed.
Text You Need to Read
If you need the text, use OCR on the original rather than upscaling it. OCR engines work directly with low-resolution input and tell you their confidence. An upscaler will render confident, wrong letterforms. The OCR listicle covers the preprocessing that actually helps.
Faces of Real People
Face restoration models can change what someone looks like. For journalism, identification, or any published photo of a named person, that is not acceptable. For a decorative crowd shot in a background, it is fine.
A Practical Decision Path
- Can you find the original? → Use it. Stop here.
- Was it generated rather than photographed? → Re-render at the target size.
- Is it a screenshot? → Recapture at 2×.
- Do you need 1.5× or 2×? → Lanczos plus a light unsharp mask.
- Is it illustration or line art? → waifu2x.
- Is it a photograph needing more than 2×? → Real-ESRGAN, then downscale to target.
- Does the result need to be truthful? → Stop. Reshoot or request the master.
Verifying the Result
Upscaling is easy to over-apply, so check before shipping.
# Compare the upscaled version against a reference downscale of itself
magick upscaled.png -resize 25% check.png
# check.png should still look like the original at that size

# Structural comparison, if you have a genuine high-res reference
magick compare -metric SSIM reference.png upscaled.png null:
And by eye, at 100%:
| Check | Failure looks like |
|---|---|
| Skin and fabric | Waxy, plastic, smoothed |
| Hair and foliage | Painted strands, mush |
| Edges | Halos, over-sharpened outlines |
| Text | Letters that changed identity |
| Flat areas | Invented texture in what was smooth |
Summary
The Seven Methods
| # | Method | Cost | Invents detail? | Best for |
|---|---|---|---|---|
| 1 | Find the original | Free | No | Always try first |
| 2 | Lanczos + sharpening | Free | No | Up to 2×, truthful output |
| 3 | Real-ESRGAN | Free | Yes | Photographs above 2× |
| 4 | waifu2x | Free | Yes | Illustration, line art |
| 5 | Commercial AI | Paid | Yes | Batch work, faces, no GPU |
| 6 | Re-render from source | Free | No | Anything generated |
| 7 | Capture larger | Free | No | Preventing the problem |
Checklist
- ✅ You looked for the original before upscaling anything
- ✅ Generated assets are re-rendered, not upscaled
- ✅ Screenshots are recaptured at 2×, never enlarged
- ✅ Enlargements beyond 2× use an AI model matched to the content type
- ✅ Sharpening happens after the resize, not before
- ✅ Results were compared against the original at 100% zoom
- ✅ No product photo shows invented texture
- ✅ Nothing evidential, medical, or identifying was upscaled
- ✅ Masters are stored separately and never optimised in place
Methods 1 and 7 solve more cases than the five upscalers combined. The best fix for a low-resolution image is usually organisational, not technical.
Sources
Related Resources
Related Guides
Image Resizing for the Web: The Complete Guide
Retina/HiDPI Images: Complete Implementation Guide
AI Image Generation: Optimizing for Web Use
10 Image Export Settings You're Probably Getting Wrong
Understanding Image Compression: Lossy vs Lossless Deep Dive
10 Product Photo Mistakes That Hurt E-commerce Conversions