How to Lower Image Resolution: Pixels, File Size, and Quality Explained
Lower image resolution without wrecking quality: pick target dimensions for screen or print, then resize with built-in tools, ImageMagick or sharp.
Disclosure: ImageGuide is published by Sirv, an image CDN company. This guide mentions Sirv products. Read how we write these guides.
Quick answer
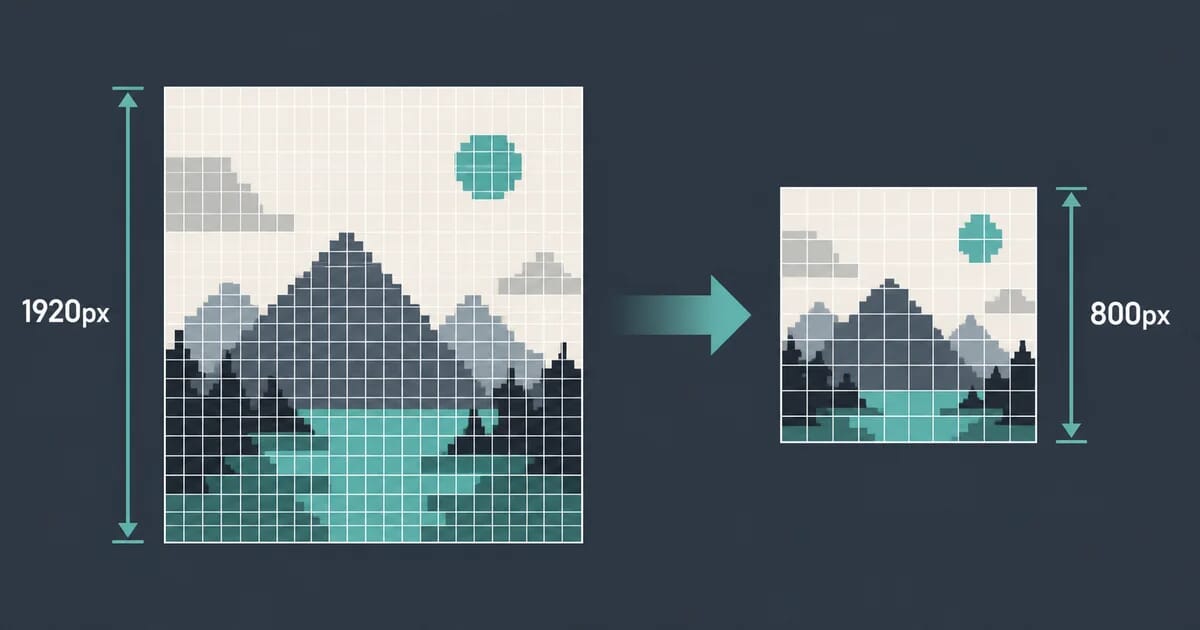
To lower image resolution, reduce its pixel dimensions with a resize operation. To reduce file size without changing dimensions, adjust the format or compression instead. Changing a DPI metadata value alone normally does not make an image smaller on a web page or remove pixels.
Reference for this answer: MDN responsive image guidance.
When people search for how to lower the resolution of an image, they usually want one of two things. They want a smaller file, or they want an image that fits a specific space. These are related goals, but they are not the same operation. This guide separates them clearly, shows you how to choose a target resolution, and walks through the best tools for the job on every platform.
Resolution, File Size, and Quality Are Three Different Things
The most common mistake is treating “resolution” and “file size” as synonyms. They are not. Keep these three concepts separate in your head and every step below becomes obvious:
| Concept | What it measures | What changes it |
|---|---|---|
| Resolution | Pixel count (e.g. 6000 x 4000) | Downsampling or upscaling |
| File size | Bytes on disk (e.g. 4.2 MB) | Resolution, format, and compression quality |
| Quality | How faithful the image looks | Resampling filter, compression settings, editing history |
Lowering the resolution always reduces file size, but you can also reduce file size without touching resolution at all. Recompressing a 6000 x 4000 photo from quality 95 to quality 80 can cut its size in half while keeping every pixel. Conversely, if you downsample but save with a wasteful format or a very high quality setting, the file may still be larger than you expect.
This means downsampling and recompression are two separate steps:
- Downsample to change the pixel count. This is the only step that changes resolution.
- Recompress to change the bytes. Choose the format and quality level here.
Do them in that order. If you compress first and resize later, the resampling filter will blur the compression artifacts you just baked in, and you lose quality twice.
Why Lower Image Resolution at All?
A modern phone produces photos around 4000 x 3000 pixels or larger. That is far more detail than most destinations need:
| Destination | Typical needed width |
|---|---|
| Blog content column | 800 px |
| Social open-graph / link card | 1200 px |
| Full-width hero on a large desktop screen | 1920 px (3840 px for retina 2x) |
| Email newsletter | 600-1200 px |
| 4K display fullscreen wallpaper | 3840 px |
| Print at 300 DPI | 300 px per inch of paper (a 4 x 6 inch print needs 1200 x 1800 px) |
Serving a 6000 px photo into an 800 px blog column downloads roughly 50 times more pixels than the screen shows. The costs are real:
- Slower page loads and worse Core Web Vitals.
- More storage and bandwidth on your server or CDN.
- Slower uploads on mobile connections.
- Larger email attachments that bounce or get clipped.
Lowering the resolution to match the destination is the single most effective optimization you can make. For a full treatment of sizing for the web specifically, see our image resizing for the web guide. If your goal is purely a smaller file and the dimensions are already correct, our reduce image file size guide covers compression instead.
Step 1: Decide the Target Resolution
Do not guess. Work backward from where the image will appear.
Screens: multiply display size by the device pixel ratio
A CSS pixel is not a hardware pixel. Phones and many laptops pack two or more physical pixels into each CSS pixel. The number is the device pixel ratio (DPR):
- Standard desktop monitors: DPR 1.
- Most laptops and phones today: DPR 2.
- Some high-end phones: DPR 3.
The formula is simple. Multiply the CSS width of the slot by the DPR of the devices your audience uses:
target width = display width in CSS px x DPRAn 800 px blog column viewed on a DPR 2 laptop looks best at 1600 px wide. A 1920 px hero for a DPR 1 office monitor needs 1920 px; for a DPR 2 audience, serve 3840 px (or serve both with srcset). Our retina and HiDPI images guide covers the multi-resolution strategy in depth.
Print: think in DPI, not pixels
Print resolution is a density, so you convert it to pixels:
pixels = inches x DPIAt the print-industry standard of 300 DPI:
| Print size | Pixels needed at 300 DPI |
|---|---|
| 4 x 6 inch | 1200 x 1800 |
| 5 x 7 inch | 1500 x 2100 |
| 8 x 10 inch | 2400 x 3000 |
| A4 (8.27 x 11.69 inch) | 2480 x 3508 |
Screens show images at roughly 72-144 PPI depending on the device. This is why an image that looks crisp on screen can print blurry: 1200 px across a 10 inch print is only 120 DPI. Never lower the resolution of an image you intend to print unless you know the final print size.
Common ready-made targets
When you just need a sensible default:
- 1920 px wide for full-width hero images.
- 1200 x 630 px for open-graph and social link previews.
- 800-1200 px wide for blog body images.
- 1600 px wide for blog images that must survive a 2x screen.
Step 2: Lower the Resolution with Built-In Tools
Windows: Paint
Paint has shipped with Windows for decades and handles this fine:
- Open the image in Paint.
- Click Resize on the Home tab.
- Switch units from Percentage to Pixels.
- Enter the target width. Keep Maintain aspect ratio checked so the height follows automatically.
- Save with File > Save As so the original stays untouched.
macOS: Preview
Preview is the fastest option on a Mac:
- Open the image in Preview.
- Open Tools > Adjust Size (or press Command-Option-I with the image, not the window, selected).
- Set the width in pixels. With Scale proportionally enabled, Preview computes the height.
- Use File > Export to also pick the format and quality when you save.
The Photos app can do it too. Select the image, choose File > Export > Export 1 Photo, and pick a size preset such as “Medium” or a custom maximum dimension.
Chromebooks and quick web needs
ChromeOS has no Paint equivalent, but any reputable web resizer works. Upload, set the width, download. For sensitive images, prefer a local tool, because web uploaders receive a copy of your file.
Step 3: Lower Resolution from the Command Line with ImageMagick
ImageMagick is the workhorse for scripted and batch work. Install it, then use convert (or magick on newer versions).
Basic downsample
magick input.jpg -resize 1600x output.jpgA bare dimension means “fit within this box.” 1600x sets the width to 1600 px and scales the height to preserve aspect ratio. x1200 would set the height instead. Giving both numbers, like -resize 1600x1200, fits the image inside that rectangle without distorting it.
To force exact dimensions and crop the overflow, add ^ and crop:
magick input.jpg -resize 1200x630^ -gravity center -extent 1200x630 og-image.jpgThis produces a perfectly centered 1200 x 630 social card.
Choosing a resampling filter
The filter decides how old pixels blend into new ones. The common choices:
| Filter | Character | Good for |
|---|---|---|
Lanczos | Sharpest of the standard filters | Default for photos, downscaling |
Mitchell | Softer, smooth gradients | Mild downscale, illustrations |
Catrom | Between the two | Photos with fine text |
Bilinear | Fast, slightly soft | Quick previews, thumbnails |
Point | Nearest neighbor, no blending | Pixel art only |
ImageMagick uses a sensible default filter for each direction of scaling. When you want to be explicit, Lanczos is the safe choice for photographs:
magick input.jpg -filter Lanczos -resize 1600x output.jpgBilinear is faster but leaves results slightly softer. For pixel art, use -scale or -filter Point, because any blending destroys hard pixel edges.
Print work: -resize vs -resample and -density
For print, ImageMagick distinguishes between changing pixels and changing the recorded density:
-resizechanges the pixel count.-resamplechanges the pixel count and keeps the physical print size by adjusting the density metadata.-densitychanges only the metadata, not the pixels.
Example: a 3000 x 2000 image tagged 300 DPI prints at 10 x 6.67 inches. If you want it to print at 8 inches wide instead:
# Keep all pixels, just retag the density: 3000 px / 8 in = 375 DPI
magick input.jpg -density 375 output.jpg
# Resample to a true 300 DPI at the same physical size
magick input.jpg -resample 300 output.jpgUse -resample when the print size is fixed and you want the pixel count to follow. Use -density alone when you want to keep every pixel and only fix what the printer is told. Remember that lowering resolution for print is usually the wrong direction: printers reward pixels, screens do not care.
Batch: mogrify
mogrify applies a command to many files in place. Always work on a copy of the folder first, because mogrify overwrites:
cp -r photos photos-small
cd photos-small
mogrify -resize 1600x -quality 82 *.jpg
That single command lowers every JPEG to at most 1600 px wide and recompresses at quality 82. Add -path done/ to write results into a subfolder instead of overwriting in place:
mogrify -path done -resize 1600x -quality 82 *.jpgStep 4: Lower Resolution in Code
Node.js with sharp
sharp is the standard image library for Node. It uses libvips, it is fast, and it picks good defaults:
import sharp from "sharp";

await sharp("input.jpg")
  .resize({ width: 1600, withoutEnlargement: true })
  .jpeg({ quality: 82, mozjpeg: true })
  .toFile("output.jpg");
Notes on the options:
width: 1600scales proportionally. Addheightto fit within a box.withoutEnlargement: truerefuses to upscale, which you almost always want.kernelselects the resampling filter. The default islanczos3;mitchellgives slightly softer results.mozjpeg: trueenables trellis quantization for noticeably smaller files at the same visual quality.
Python with Pillow
Pillow is the Python equivalent:
from PIL import Image

img = Image.open("input.jpg")
img = img.resize((1600, 1067), Image.LANCZOS)
img.save("output.jpg", quality=82, optimize=True)
Image.LANCZOS is the filter to use for photos. Image.BILINEAR is faster and softer; Image.NEAREST keeps hard edges for pixel art. If you do not know the target height, compute it from the aspect ratio:
target_width = 1600
ratio = target_width / img.width
target_height = round(img.height * ratio)
img = img.resize((target_width, target_height), Image.LANCZOS)
Doing it at the edge instead
If your images ship through a CDN, you can often skip build-time resizing entirely. Sirv, for example, can deliver any width on demand through URL parameters, so one master file serves every screen size, and the Sirv Media Viewer handles responsive delivery, zoom, and 360 spins from that same master. This is the lowest-maintenance option once you have more than a handful of images.
Keeping Quality When You Lower the Resolution
Downsampling throws information away, so the goal is to throw away the right information. Four habits cover most cases:
-
Always keep the original. Every resave of a lossy JPEG or WebP is a new generation of loss. Work from the master file each time, never from a previously compressed copy.
-
Downscale, then sharpen, then compress. Resampling softens edges slightly. A gentle sharpen after the resize restores crispness before compression locks it in:
magick input.jpg -resize 1600x -unsharp 0.5x0.5+0.5+0.008 -quality 82 output.jpgIn sharp, use
.sharpen({ sigma: 0.5 })after.resize(). Keep the amount modest; oversharpened halos compress badly. -
Use the right format for the content. Photos compress well as JPEG, WebP, or AVIF. Flat graphics with few colors belong in PNG or WebP. Converting a photo to PNG can make the file larger than the original JPEG.
-
Do not over-compress after downsizing. You already saved a lot of bytes by shrinking the pixels. A moderate quality of 80-85 usually looks identical to quality 95 at these sizes and costs far less.
If a file is still too heavy after downsampling correctly, compression is the lever left, and the reduce image file size guide walks through it. For product shots that need retouching before delivery, Sirv Studio handles background removal and AI edits, and new accounts can sign up here.
The Upscaling Warning: You Cannot Add Detail Back
This is the trap on the other side of the operation. If you lower an image to 800 px, throw away the original, and later need it at 1600 px, you are out of luck. Upscaling interpolates new pixels from the old ones. The result is soft, smeared, or plasticky, because the detail simply is not in the file anymore. AI upscalers can invent plausible detail, but they invent it; it is not your original information.
The rule: downscale freely from a preserved master, never treat a downscaled file as your new master. If you have already lost the original and need a larger version, read our guide on how to upscale image quality for what is realistically recoverable.
Common Pitfalls
Aspect ratio distortion
Entering a width and a height that do not match the original ratio stretches the image. People’s faces go wide, circles become ovals. Always scale one dimension and let the tool compute the other, or use “fit within box” modes. If you truly need an exact canvas, resize to fit and then crop, as the ImageMagick -extent example above shows.
Generation loss
Every save of a lossy format re-quantizes the image. Resize a JPEG, save it, resize it again, save it again, and artifacts stack up. The fix is procedural, not technical: keep one master, and regenerate every derivative from it. If you must chain edits, work in a lossless format (PNG, TIFF) between steps and compress once, at the end.
Forgetting retina needs
An image that looks perfect on your DPR 1 monitor can look fuzzy on the phone that most of your audience uses. When you pick 800 px for a blog image because the column is 800 CSS px, you have under-delivered by 2x. Either ship 1600 px for that slot or use srcset to serve both. The math from Step 1 exists precisely to prevent this mistake.
Lowering resolution when the format was the problem
Sometimes a huge file is huge because of the format, not the pixels. A 4000 x 3000 PNG photo can be 12 MB; the identical photo as WebP at quality 82 might be 800 KB with no resolution change at all. Before you downsample, check whether a format change alone solves the problem. Keep the pixels when you can afford to.
Resaving screenshots and graphics as JPEG
JPEG is for photographs. A screenshot saved as JPEG at low quality develops ringing around text. If your “image” is UI or text-heavy, lower its resolution with a lossless format (PNG or WebP lossless) instead, and it will stay sharp at any size.
Quick Decision Guide
Use this table to jump straight to the right operation:
| Your situation | Do this |
|---|---|
| Photo too big for a blog post | Resize to 1200-1600 px wide, save as WebP or JPEG q80-85 |
| Social preview rejected for size | Crop to 1200 x 630, keep under ~1 MB |
| Image looks blurry on phones | You under-sized it; serve 2x width or use srcset |
| Huge file but pixels are fine | Change format / quality, not resolution |
| Batch of 500 photos | mogrify -resize 1600x -quality 82 on a copy |
| Need a specific print size | Keep pixels, set -resample 300 or -density; do not downsample |
| Only have a small image, need bigger | Upscale carefully; detail cannot be recovered |
Summary
To lower the resolution of an image well, you do four things. First, decide the target from the destination: display width times device pixel ratio for screens, inches times 300 for print. Second, downsample with a good filter such as Lanczos, using Paint, Preview, ImageMagick, sharp, or Pillow. Third, recompress deliberately in a modern format at a moderate quality, with a light sharpen after the resize. Fourth, keep the original master so you never need to upscale a file you already shrank. Pixels and bytes are separate dials, and now you know how to turn each one on purpose.