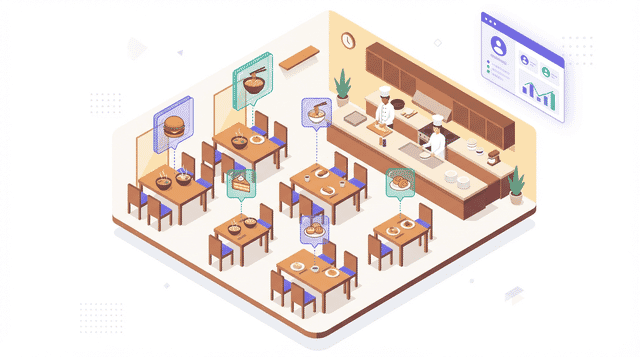
Restaurants & Food Image Optimization
Food photography and restaurant image optimization
Food photography is uniquely demanding — color accuracy, texture detail, and appetite appeal all depend on how images are captured, processed, and delivered. For restaurants, images drive decisions at every stage of the customer journey: Google Business listings, social media feeds, third-party delivery platforms like Uber Eats and DoorDash, and the restaurant's own website and digital menu. A single dish might need to be optimized for ten different contexts, each with different dimension requirements, compression tolerances, and color expectations. Getting this right means more clicks, more orders, and more foot traffic.
Delivery Platform Image Requirements
Third-party delivery platforms each have specific image requirements, and meeting them precisely can mean the difference between a dish that gets ordered and one that gets skipped. Platforms use your food images as the primary browsing interface, so quality here directly impacts revenue.
Uber Eats requires menu item photos at minimum 1200x800 pixels in JPEG or PNG format, but recommends 2880x1920 for high-DPI displays. Images must feature the actual dish against a clean background with no text overlays, logos, or watermarks. Uber Eats applies its own compression, so upload at quality 90+ to avoid double-compression artifacts.
DoorDash accepts images at minimum 1200x800 and recommends 2400x1600. Like Uber Eats, they prohibit text overlays and collages. DoorDash's image guidelines specifically call for natural lighting, a shallow depth of field, and a 45-degree angle.
Grubhub requires a minimum of 1600x1200 and strongly prefers landscape orientation. They have an image review process that rejects photos with poor lighting, heavy filters, or visible brand watermarks.
Google Food Ordering (integrated into Google Business Profile) uses the same images as your Google Business listing. Ensure your primary dish photos are at least 720x720 pixels; 1200x1200 is recommended.
Best practice: Create a single high-quality master at 2880x1920 (quality 92) for each dish, then generate platform-specific exports. This avoids quality degradation from repeated editing and ensures consistency across platforms. Use batch tools like Lightroom presets, Sirv, or ImageMagick scripts to automate the process.
Social Media Food Photography Optimization
Social media is where most restaurants generate awareness, and food photography is among the most shared content categories on Instagram, TikTok, and Facebook. Optimizing for social platforms means understanding each one's image processing pipeline.
Instagram accepts images up to 1080x1350 (4:5 portrait) and processes uploads through its own compression. To minimize Instagram's compression artifacts:
- Upload at exactly 1080px wide — Instagram will not resize, avoiding a compression round.
- Export at JPEG quality 95 from your editor. Instagram's compression will bring the final quality down, so starting high preserves more detail.
- Avoid extreme sharpening before upload; Instagram's compression amplifies sharpening halos.
- Use sRGB color space — Instagram strips other color profiles, causing color shifts.
Facebook displays images at up to 2048px wide and compresses aggressively. Upload at 2048px wide, quality 90+ to get the best results after Facebook's processing. For food photos with text (specials, announcements), keep text large and high-contrast since compression hits fine text hardest.
TikTok and Reels: For video thumbnails and story images, use 1080x1920 (9:16). Keep the main subject in the center 1080x1080 area since cropping varies by device.
Pinterest favors 2:3 vertical images (1000x1500) and is a major traffic driver for recipe and restaurant content. Pinterest's visual search engine means your food photos can generate traffic for years — invest in quality here.
For your website, don't just reuse social media exports. Social platforms compress images in ways optimized for their infrastructure, not yours. Create web-specific exports at appropriate dimensions with WebP format and your own quality settings.
Menu Design and Digital Menu Image Optimization
Digital menus have surged in adoption since 2020, and they present unique image optimization challenges. Whether it's a QR-code menu on a tablet, a PDF menu on your website, or an interactive web menu, the images need to load fast on mobile devices often connected via cellular data in the restaurant.
QR code menus (mobile-first):
- Target 150-300 KB maximum per dish image. Customers are often on cellular connections inside the restaurant.
- Use 640x640 or 800x800 images — mobile screens don't benefit from larger sizes in a menu context.
- Serve WebP format with JPEG fallback. This alone can cut your menu page size by 30%.
- Lazy load everything below the first visible section. A menu might have 40-80 dish images.
- Consider using a CSS grid with
aspect-ratio: 1to prevent layout shift as images load.
PDF menus with photos:
- Embed images at 150 DPI for screen viewing (not 300 DPI print resolution) to keep PDF size manageable.
- A photo-heavy 4-page menu at 300 DPI can be 25-40 MB; at 150 DPI with JPEG compression, it drops to 3-6 MB.
- Use PDF optimization tools like Ghostscript or Adobe Acrobat's "Reduce File Size" to recompress embedded images.
Website menu pages:
- Organize images in a grid layout with consistent dimensions — mixed aspect ratios look chaotic.
- Use responsive images with srcset: 400w for mobile menu browsing, 800w for desktop.
- Group menu sections with headings and load images section-by-section using Intersection Observer.
- Total page weight for a full menu with 50+ images should be under 4 MB on initial load with lazy loading.
For all digital menu contexts, consistency is key. Photograph every dish with the same lighting setup, angle (45-degree overhead is most popular), and background. This creates a professional, cohesive browsing experience that encourages ordering.
Google Business Profile Image Optimization
Your Google Business Profile is often the first impression potential customers have, and it's heavily visual. Google's own data shows that businesses with photos receive 42% more requests for directions and 35% more click-throughs to their websites. For restaurants, this effect is amplified because food is inherently visual.
Google Business image specifications:
- Format: JPEG or PNG, 10 KB to 5 MB file size.
- Resolution: Minimum 720x720 pixels; Google recommends 720px on the shortest side.
- Aspect ratio: Google supports various ratios but crops to fit different display contexts. Leave breathing room around subjects to account for cropping.
- Cover photo: Displays at 16:9 on many surfaces — 1920x1080 is ideal.
- Profile photo (logo): 250x250 minimum, displayed in a circle, so keep important content away from corners.
What to upload:
- Exterior photos: 2-3 images showing the entrance from different angles and at night if you're open evenings.
- Interior photos: 3-5 images covering the dining room, bar area, patio, and any distinctive features.
- Food photos: 8-15 of your most popular and photogenic dishes. These generate the most engagement.
- Menu photos: Upload your current menu as images (high-contrast, readable).
- Team photos: 1-2 images of staff to humanize your brand.
Google aggressively compresses uploaded images, so upload at quality 90+ and at least 2000px on the longest side. Google will resize and compress for different display contexts, but starting with a high-quality source ensures better results. Update your photos seasonally — fresh images signal an active business and help Google surface your listing more frequently.
Food Photography Technical Best Practices
The technical execution of food photography impacts optimization as much as the creative side. Properly shot and processed images compress better, maintain quality at lower file sizes, and look more appealing across devices.
Camera settings for web-optimized food photography:
- ISO: Keep at 100-400 to minimize noise. Noise is the enemy of compression — noisy images compress poorly because the random noise pattern is incompressible data.
- Aperture: f/2.8 to f/5.6 for single dishes with background blur; f/8 to f/11 for flat-lay or full-table shots where everything should be sharp.
- White balance: Set manually or use a gray card. Auto white balance varies shot-to-shot, creating inconsistency in menu grids.
- Shoot RAW: RAW files give you full control over white balance, exposure, and color in post-processing, enabling more consistent results across your entire menu.
Post-processing for web delivery:
- Correct white balance first — neutral whites make food colors pop naturally without artificial saturation.
- Increase clarity/texture by +10 to +20 to enhance food texture detail (bread crust, grill marks, sauce glossiness).
- Avoid heavy saturation boosts — they look unnatural and can shift food colors into unappetizing tones on some displays.
- Sharpen for output size: use Lightroom's "Sharpen For Screen" at export, or apply Unsharp Mask at 0.5px radius, 80-120% amount for web-sized images.
Color accuracy matters: A study by Kissmetrics found that color influences 85% of purchase decisions. For food, this means your tomato sauce should look red (not orange from bad white balance), your greens should look fresh (not yellow from under-saturated editing), and your chocolate should look rich (not washed out from over-exposure). Calibrate your editing monitor with a tool like X-Rite i1Display or Datacolor Spyder, and always verify your exports on a mobile device before publishing.
Restaurant Website Performance and Image Strategy
Restaurant websites have notoriously poor performance scores, largely due to image-heavy designs built by agencies focused on visual impact rather than web performance. A 2023 analysis by Lighthouse found that the average restaurant website scores 35/100 on performance, with images being the primary culprit. This matters because Google uses Core Web Vitals as a ranking signal, and slow restaurant websites lose local search visibility to faster competitors.
Image strategy for restaurant websites:
- Hero section: Use a single high-impact image or short video loop, not a carousel. Carousels load multiple large images upfront and rarely get interacted with past the first slide. Optimize the hero image as WebP at 1920x1080, quality 78, with a preload hint in the
. - Menu page: This is typically the most-visited page. Use thumbnail images (400x400, quality 72) in the grid view, with full-size images (1200x800, quality 80) loaded on click/tap.
- Gallery page: Implement virtualized or paginated image loading. Show 12-16 images per page rather than loading 100+ photos in a single scroll.
- About page: 2-3 images of the team and space. These can be more compressed (quality 68-72) since they're not food.
Performance targets for restaurant sites:
- Total initial page weight: Under 2.5 MB (including all assets, not just images).
- LCP: Under 2.5 seconds on mobile 4G.
- Images should represent no more than 60% of total page weight.
- Use
for your CDN or image optimization service.
Quick wins that matter most: Converting from PNG to WebP (common in restaurant site templates), implementing lazy loading, and properly sizing images for their display containers. These three changes alone typically reduce page weight by 50-70% on restaurant sites. Use Google PageSpeed Insights to identify your biggest image optimization opportunities and address them in order of impact.
Common Image Types
Recommended Sizes
Best Formats for Restaurants & Food
Pro Tips
- → Maintain high color saturation accuracy — food photography lives and dies by color. Always export in sRGB color space and test on multiple devices to ensure reds, greens, and warm tones render appetizingly
- → Use JPEG quality 78-85 for food photos; compression below 75 introduces banding in smooth gradients like sauces, soups, and beverages that looks unappetizing
- → Shoot at the highest resolution your camera allows, then export derivatives: 2048x2048 for archive, 1200x800 for website, 1080x1080 for social, 640x640 for delivery platforms
- → Consistent lighting across your entire menu photo set is more important than individual shot perfection — inconsistency in white balance looks unprofessional in grid layouts
- → Square crops (1:1) are the most versatile format for restaurants — they work on Instagram, Google Business, delivery apps, and digital menus without additional cropping
- → Compress interior and ambiance photos more aggressively (quality 68-75) than dish photos (quality 78-85) — customers scrutinize food images far more closely
- → Add descriptive alt text with dish names and key ingredients — this improves accessibility and helps Google image search surface your food photos for relevant queries
- → Strip EXIF metadata from all uploads to save 15-40 KB per image and protect location data, but preserve ICC color profiles to maintain accurate color rendering
Related Guides
JPEG Optimization Mastery: The Definitive Guide
Master JPEG optimization with this comprehensive guide covering compression fundamentals, quality settings, progressive encoding, chroma subsampling, and advanced techniques for maximum performance.
Color Spaces, Profiles, and the Web
Master color management for web images. Learn sRGB, Display P3, color profiles, wide gamut displays, and ensuring consistent color across devices.
Understanding Image Compression: Lossy vs Lossless Deep Dive
Master image compression fundamentals. Learn how lossy and lossless compression work, quality metrics, format comparisons, and optimization strategies for the web.
The Complete WebP Guide: Everything You Need to Know
Master WebP image format with this comprehensive guide covering encoding, optimization, browser support, conversion strategies, and real-world implementation.
Frequently Asked Questions
What image size do Uber Eats and DoorDash require for menu items?
Uber Eats requires a minimum of 1200x800 pixels and recommends 2880x1920 for optimal display on high-DPI screens. DoorDash requires a minimum of 1200x800 and recommends 2400x1600. Both platforms prohibit text overlays, logos, and collages. Create a single master image at 2880x1920, JPEG quality 92, and generate platform-specific exports from that master to maintain consistency across all delivery platforms.
How do I optimize food photos for Instagram without losing quality?
Upload at exactly 1080px wide (or 1080x1350 for portrait) at JPEG quality 95 from your photo editor. Instagram's compression will bring the effective quality down, so starting high minimizes double-compression artifacts. Use sRGB color space since Instagram strips other profiles, avoid heavy pre-sharpening which gets amplified by Instagram's processing, and don't apply Instagram's built-in filters to food photos — they shift colors in ways that make food less appetizing.
Should restaurant menu photos be square or rectangular?
Square (1:1) is the most versatile aspect ratio for restaurant menu images because it works across the widest range of contexts: Instagram feeds, Google Business listings, delivery platform grids, and digital menus all display well with square images. Shoot in landscape orientation (the camera default) but compose with a square crop in mind, keeping the dish centered. This gives you the option to export both square and landscape versions from the same source image.
How many food photos should a restaurant website have and how does that affect loading speed?
A restaurant website typically needs 8-15 hero dish photos, 3-5 interior shots, and optionally a photo per menu item (which could be 40-80+ images). The key to handling this volume without destroying performance is lazy loading and proper sizing. With lazy loading, only the 3-5 images visible on screen load initially, keeping the initial page weight under 2 MB. Each additional image loads on scroll at around 80-150 KB if properly optimized (WebP, 800px wide, quality 75), so even a 50-image page stays responsive.
Ready to optimize at scale?
Sirv helps restaurants & food businesses deliver optimized images automatically.