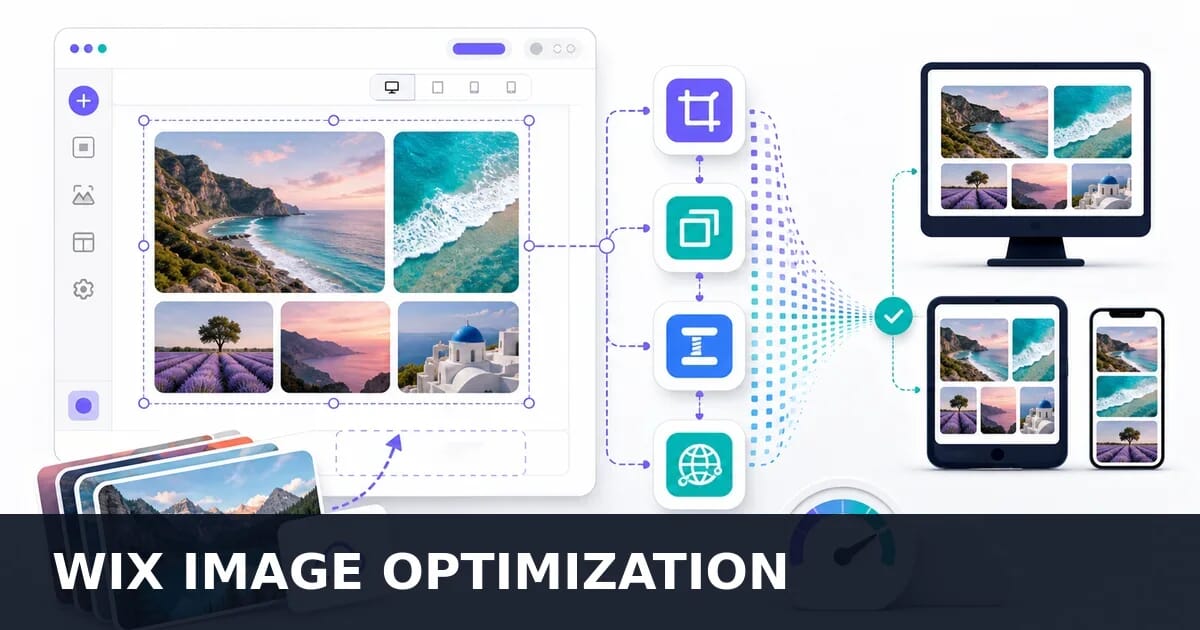
Wix Image Optimization: Complete Guide
Image optimization on Wix: what Wix does automatically, how to prepare uploads, gallery settings, SEO fields, and the limits you cannot change.
Disclosure: ImageGuide is published by Sirv, an image CDN company. This guide mentions Sirv products. Read how we write these guides.
Wix powers millions of websites and handles much of image optimization behind the scenes. But understanding how the platform processes images, what you can control, and where its automatic systems fall short lets you build noticeably faster, better-looking Wix sites. This guide covers everything from upload preparation to advanced Velo code patterns.
How Wix Handles Images
Automatic Processing Pipeline
When you upload an image to Wix, the platform runs it through a multi-stage pipeline:
- Storage: Original image is stored in Wix’s media system
- Analysis: Wix detects dimensions, format, and content characteristics
- Variant generation: Multiple resized versions are created on-demand
- Format conversion: WebP and AVIF versions are generated for supporting browsers
- CDN distribution: Images are cached on a global CDN for fast delivery
- Placeholder generation: Low-quality image placeholders (LQIP) are created
What Wix Does Automatically
| Feature | Implementation | Your Control |
|---|---|---|
| WebP conversion | Automatic via Accept header | None |
| AVIF conversion | Automatic for supporting browsers | None |
| Responsive sizing | Multiple sizes generated | Partial (via layout choices) |
| Lazy loading | Applied to below-fold images | Limited |
| LQIP placeholders | Blurred preview while loading | None |
| CDN delivery | Global edge caching | None |
| Compression | Applied at delivery time | Quality setting per image |
| Metadata stripping | EXIF data removed on delivery | None |
Wix Image URL Structure
Wix serves images through its media platform. Understanding the URL structure helps with debugging:
https://static.wixstatic.com/media/
  {media_hash}.jpg           # Original filename hash
  /v1/fill/                  # Transform operation
  w_800,h_600,              # Dimensions
  al_c,                     # Alignment (center)
  q_80,                     # Quality
  usm_0.66_1.00_0.01,      # Unsharp mask
  enc_auto/                 # Encoding (auto-negotiated)
  image.jpg                 # Served filename
URL Parameters Reference
| Parameter | Description | Example |
|---|---|---|
w_ | Width in pixels | w_800 |
h_ | Height in pixels | h_600 |
q_ | Quality (1-100) | q_80 |
al_c | Align center | al_c |
al_t | Align top | al_t |
lg_ | Lanczos sharpening | lg_1 |
usm_ | Unsharp mask (amount, radius, threshold) | usm_0.66_1.00_0.01 |
enc_auto | Auto format negotiation | enc_auto |
enc_avif | Force AVIF output | enc_avif |
Image Upload Best Practices
Recommended Dimensions by Use Case
Getting your upload dimensions right is the single most impactful thing you can do. Upload too small and images look blurry on retina screens. Upload too large and you waste storage and slow down the editor experience.
| Use Case | Recommended Dimensions | Max File Size | Format |
|---|---|---|---|
| Hero/Header banner | 1920x1080 | 500KB | JPEG |
| Full-width background | 1920x1280 | 500KB | JPEG |
| Strip/Section background | 1920x900 | 400KB | JPEG |
| Blog featured image | 1200x630 | 250KB | JPEG |
| Blog inline image | 1000x750 | 200KB | JPEG |
| Gallery (landscape) | 1600x1200 | 300KB | JPEG |
| Gallery (square) | 1200x1200 | 250KB | JPEG |
| Gallery (portrait) | 1000x1400 | 300KB | JPEG |
| Logo (transparent) | 500x200 | 50KB | PNG |
| Logo (favicon) | 192x192 | 20KB | PNG |
| Product image | 1600x1600 | 300KB | JPEG/PNG |
| Product thumbnail | 800x800 | 100KB | JPEG |
| Team member photo | 800x800 | 150KB | JPEG |
| Icon/illustration | 500x500 | 30KB | PNG/SVG |
| Social sharing (OG) | 1200x630 | 200KB | JPEG |
Why These Dimensions?
1920px width for full-width images: Covers most desktop screens including retina at 2x pixel density on standard laptop displays. Going larger provides minimal benefit since Wix will resize down anyway.
1200-1600px for content images: Wide enough for crisp display at content-width (typically 600-800px CSS) on retina screens, without being wastefully large.
Square for products/avatars: Wix crops these to fit various layouts. Square originals give maximum flexibility.
Pre-Upload Optimization
Always optimize before uploading. Wix applies its own compression, but starting with a well-optimized source produces better final results.
# Resize and optimize with ImageMagick
magick input.jpg -resize 1920x1080 -quality 85 -strip \
  -colorspace sRGB -sampling-factor 4:2:0 output.jpg

# Batch optimize a directory
for file in *.jpg; do
  magick "$file" -resize "1920x1920>" -quality 85 -strip "$file"
done

# Convert PNG screenshots to optimized JPEG
magick screenshot.png -quality 90 -strip screenshot.jpg
# Using sharp-cli for batch processing
npx sharp-cli resize 1920 --withoutEnlargement \
--quality 85 --input "*.jpg" --output optimized/Format Selection Before Upload
| Content Type | Best Upload Format | Reason |
|---|---|---|
| Photographs | JPEG | Best size-to-quality ratio |
| Logo (transparent bg) | PNG | Preserves transparency |
| Logo (solid bg) | SVG or PNG | SVG scales perfectly |
| Screenshots | PNG | Preserves text sharpness |
| Icons | SVG | Resolution-independent |
| Illustrations | PNG or SVG | Sharp edges, flat colors |
| Product (white bg) | JPEG | Smaller than PNG for photos |
| Product (transparent bg) | PNG | Maintains cutout quality |
| Infographics | PNG | Text and graphics clarity |
Color Space
Always export in sRGB. Other color spaces (Adobe RGB, ProPhoto RGB, CMYK) may cause color shifts on the web:
# Convert color profile to sRGB
magick input.jpg -colorspace sRGB output.jpg

# Verify color profile
identify -verbose input.jpg | grep "Colorspace"
Wix Image Settings
Quality Settings in the Editor
Wix Editor provides image quality controls:
- Click on the image in the editor
- Click “Settings” or the gear icon
- Adjust the quality slider
| Quality Level | Setting | Best For |
|---|---|---|
| Uncompressed | 100% | Never use for web |
| High | 80-90% | Hero images, portfolio |
| Medium | 60-80% | Blog images, general content |
| Low | 40-60% | Thumbnails, backgrounds with overlay |
Recommendation: Use 80% quality for most images. The visual difference from 100% is imperceptible, but files are 40-60% smaller.
Focal Points
Focal points tell Wix which part of the image to keep visible when the image is cropped for different screen sizes.
Setting a focal point:
- Click the image in the editor
- Click “Change Image” or “Settings”
- Click “Set Focal Point”
- Drag the crosshair to the most important part
- Save
When focal points matter:
| Element | Focal Point Impact |
|---|---|
| Header/hero images | Critical - heavy cropping on mobile |
| Strip backgrounds | Critical - different aspect on each device |
| Gallery (cropped mode) | High - determines visible area |
| Blog featured images | High - shown at different ratios in feeds |
| Product images | Medium - usually displayed at original ratio |
| Inline content images | Low - minimal cropping |
Image Cropping Options
Wix provides several crop/fit modes:
| Mode | Description | Use Case |
|---|---|---|
| Fill | Covers entire area, may crop edges | Backgrounds, headers |
| Fit | Shows entire image, may add padding | Product images, logos |
| Stretch | Distorts to fill area | Never recommended |
| Tile | Repeats image as pattern | Subtle texture backgrounds |
Wix Pro Gallery Optimization
Gallery Types and Their Impact
Wix Pro Gallery offers multiple layouts, each with different performance characteristics:
| Gallery Layout | Image Loading | Performance Impact | Best For |
|---|---|---|---|
| Grid | Loads visible grid | Medium | Portfolio, products |
| Masonry | Progressive row loading | Medium | Mixed-ratio photography |
| Slider | Loads current + neighbors | Low | Feature showcases |
| Slideshow | Loads current + next | Low | Presentations |
| Thumbnails | Loads thumbs + current | Medium | Product galleries |
| Collage | Loads visible portion | Medium-High | Creative layouts |
| Strip | Sequential loading | Medium | Horizontal scrolling |
| Fullscreen | Loads current + adjacent | Low | Immersive photography |
Gallery Settings for Performance
Image count per page: Keep galleries under 30 images per page. For larger collections, use pagination or “Load More” patterns.
Gallery image size settings:
| Setting | Recommendation | Why |
|---|---|---|
| Thumbnail resolution | Medium (300-400px) | Balances quality and speed |
| Full-view resolution | High (1200-1600px) | Crisp on click/expand |
| Slideshow quality | 80% | Good visual quality, fast transitions |
| Enable download | Only if needed | Prevents unnecessary large-image loads |
Optimizing Gallery Image Sets
Before uploading a gallery set:
# Prepare gallery images - consistent sizing
for file in gallery/*.jpg; do
  magick "$file" -resize "1600x1600>" -quality 82 -strip \
    -colorspace sRGB "$file"
done

# Create consistent aspect ratio for grid galleries
for file in gallery/*.jpg; do
  magick "$file" -resize 1200x900^ -gravity center \
    -extent 1200x900 -quality 82 -strip "$file"
done
Gallery Lazy Loading Behavior
Wix Pro Gallery implements its own lazy loading:
- Above-fold gallery: First 4-8 images load immediately
- Below-fold gallery: Loads when scrolled into view
- Within gallery: Images load as user scrolls/navigates
- Lightbox: Full-size loads on click
Tip: Place your most important gallery above the fold only if it contains fewer than 8 images. Large galleries in the first viewport delay Largest Contentful Paint (LCP).
Wix Velo (Code) Image Handling
Dynamic Image Display with $w
Wix Velo (formerly Corvid) lets you control images programmatically:
// Set image source dynamically
$w('#myImage').src = 'wix:image://v1/abc123/photo.jpg/photo.jpg#originWidth=1920&originHeight=1080';

// Set from Wix Media URL
$w('#myImage').src = 'https://static.wixstatic.com/media/abc123.jpg';

// Set alt text programmatically
$w('#myImage').alt = 'Sunset over the mountains';
Working with Wix Media Manager
import wixMedia from 'wix-media-backend';

// Get image URL at specific dimensions
const imageUrl = wixMedia.getImageUrl('abc123.jpg')
  .width(800)
  .height(600)
  .quality(80)
  .build();

// Get responsive URLs for different breakpoints
function getResponsiveUrls(imageId) {
  const breakpoints = [
    { width: 480, label: 'mobile' },
    { width: 768, label: 'tablet' },
    { width: 1200, label: 'desktop' },
    { width: 1920, label: 'fullhd' }
  ];

  return breakpoints.map(bp => ({
    ...bp,
    url: wixMedia.getImageUrl(imageId)
      .width(bp.width)
      .quality(80)
      .build()
  }));
}
Dynamic Galleries with Velo
import wixData from 'wix-data';

$w.onReady(async function () {
  // Fetch images from a CMS collection
  const results = await wixData.query('GalleryImages')
    .ascending('sortOrder')
    .limit(50)
    .find();

  // Map to gallery items
  const items = results.items.map(item => ({
    type: 'image',
    src: item.image,
    alt: item.title,
    title: item.title,
    description: item.description
  }));

  // Set gallery items
  $w('#proGallery').items = items;
});
Responsive Image Handling in Velo
import wixWindow from 'wix-window';

$w.onReady(function () {
  const viewportWidth = wixWindow.getBoundingRect().width;

  // Choose image quality based on viewport
  let quality = 80;
  let width = 1200;

  if (viewportWidth <= 480) {
    quality = 70;
    width = 480;
  } else if (viewportWidth <= 768) {
    quality = 75;
    width = 768;
  } else if (viewportWidth <= 1200) {
    quality = 80;
    width = 1200;
  } else {
    quality = 85;
    width = 1920;
  }

  // Apply to hero image
  $w('#heroImage').src = buildOptimizedUrl($w('#heroImage').src, width, quality);
});

function buildOptimizedUrl(originalSrc, width, quality) {
  // Modify Wix image URL parameters
  const url = new URL(originalSrc);
  // Wix URLs can be manipulated via the fill transform
  return originalSrc
    .replace(/w_\d+/, `w_${width}`)
    .replace(/q_\d+/, `q_${quality}`);
}
Wix Image SEO
Alt Text Best Practices
Wix allows alt text on every image element. This is critical for both accessibility and search ranking.
Setting alt text:
- Click the image in the editor
- Open the image settings panel
- Find “What’s in the image? (Alt Text)”
- Write a descriptive, keyword-relevant description
Alt text guidelines:
| Quality | Example | Why |
|---|---|---|
| Poor | “image” | No context |
| Poor | “IMG_4523.jpg” | Filename, not description |
| Weak | “photo of product” | Too generic |
| Good | “Blue ceramic coffee mug on wooden table” | Descriptive |
| Best | “Handmade blue ceramic coffee mug - 12oz capacity” | Descriptive + relevant keywords |
File Naming Before Upload
Wix uses your original filename in some contexts. Name files descriptively before uploading:
Bad filenames:
  IMG_4523.jpg
  DSC00291.jpg
  photo (2).jpg
  Screenshot 2024-01-15.png

Good filenames:
  blue-ceramic-coffee-mug.jpg
  mountain-sunset-landscape.jpg
  product-leather-bag-front.jpg
  team-photo-office-2024.jpg
Image Titles and Tooltips
Wix supports image titles (shown on hover in some browsers):
- Click the image
- Open settings
- Add a title in the “Tooltip” field
Use titles to add supplementary information, not to duplicate alt text.
Structured Data for Images
Wix generates some structured data automatically, but you can enhance it:
Automatic structured data:
- Product images get Product schema
- Blog post images get Article schema
- Business logo gets Organization schema
Adding custom structured data via Velo:
// Add to your page's head via Velo
import wixSeo from 'wix-seo';

$w.onReady(function () {
  wixSeo.setStructuredData([
    {
      '@context': 'https://schema.org',
      '@type': 'ImageObject',
      'name': 'Blue Ceramic Coffee Mug',
      'description': 'Handmade blue ceramic mug, 12oz capacity',
      'contentUrl': 'https://static.wixstatic.com/media/abc123.jpg',
      'width': '1600',
      'height': '1200',
      'thumbnailUrl': 'https://static.wixstatic.com/media/abc123.jpg/v1/fill/w_400,h_300/mug.jpg'
    }
  ]);
});
Open Graph and Social Images
Wix automatically generates OG tags, but you should customize them:
- Go to Site Settings > SEO
- Set default social sharing image (1200x630)
- For individual pages, use the SEO panel to set page-specific OG images
OG image specifications:
| Platform | Recommended Size | Aspect Ratio |
|---|---|---|
| 1200x630 | 1.91:1 | |
| 1200x628 | 1.91:1 | |
| 1200x627 | 1.91:1 | |
| 1000x1500 | 2:3 |
Wix Editor vs Wix Studio
Image Handling Differences
Wix offers two editor experiences with different image capabilities:
| Feature | Wix Editor (Classic) | Wix Studio |
|---|---|---|
| Image upload | Drag and drop | Drag and drop |
| Focal points | Manual setting | Manual + AI-assisted |
| Responsive control | Limited breakpoints | Full breakpoint control |
| Custom CSS for images | Not available | Available |
| Image animations | Built-in effects | Built-in + custom CSS |
| Background images | Per-section | Per-element + advanced |
| Image containers | Fixed options | Flexible layout options |
| Code access | Velo (same) | Velo (same) |
| Performance monitoring | Basic | Advanced metrics |
Wix Studio Responsive Images
Wix Studio provides more granular control over responsive image behavior:
/* Custom CSS in Wix Studio */
.hero-image {
  object-fit: cover;
  object-position: center 30%; /* Custom focal point via CSS */
}

@media (max-width: 768px) {
  .hero-image {
    object-position: center 50%;
    aspect-ratio: 4/3; /* Different ratio on mobile */
  }
}
Wix Studio Image Layout Modes
| Mode | Description | Responsive Behavior |
|---|---|---|
| Fill | Image fills container | Crops to maintain coverage |
| Fit | Image fits within container | May show padding |
| Fixed | Exact pixel dimensions | Does not resize |
| Scale | Percentage-based sizing | Resizes proportionally |
| Fluid | Adapts to parent container | Full responsive |
When to Choose Wix Studio Over Classic Editor
Choose Wix Studio when:
- You need custom breakpoints for images
- You want CSS-level control over image display
- You are building for a client and need precise responsive behavior
- You need complex grid layouts with mixed image sizes
Choose Wix Classic Editor when:
- You want simpler, drag-and-drop workflows
- You are building a basic site or blog
- You do not need fine-grained responsive control
Performance Monitoring
Wix Site Speed Dashboard
Wix provides a built-in performance dashboard:
- Go to Dashboard > Analytics & Reports > Site Speed
- Review Core Web Vitals scores
- Check image-specific recommendations
What to look for:
| Metric | Target | Image Impact |
|---|---|---|
| LCP (Largest Contentful Paint) | Under 2.5s | Hero/banner images are usually LCP |
| CLS (Cumulative Layout Shift) | Under 0.1 | Missing dimensions cause layout shift |
| FID (First Input Delay) | Under 100ms | Heavy image JS can block interaction |
| Total Page Weight | Under 3MB | Images are typically 50-80% of weight |
Identifying Image Performance Issues
In Chrome DevTools:
- Open DevTools > Network tab
- Filter by “Img” type
- Sort by size (largest first)
- Check for:
- Images over 500KB (likely needs optimization)
- Images wider than 2000px served to small viewports
- Multiple format requests (indicates fallback issues)
- Long TTFB on image requests (CDN issue)
In Lighthouse:
Run a Lighthouse audit and check:
- “Properly size images” - flags oversized images
- “Serve images in next-gen formats” - checks for WebP/AVIF
- “Efficiently encode images” - checks compression
- “Defer offscreen images” - checks lazy loading
Core Web Vitals and Wix Images
LCP optimization:
- Ensure hero image is under 200KB
- Avoid placing a gallery above the fold
- Use Wix’s built-in image component (not custom HTML)
- Do not use video backgrounds when an image would work
CLS prevention:
- Always use Wix image elements (they include width/height)
- Avoid dynamically loaded images that shift content
- Set fixed heights on strip/section backgrounds
Common Wix Image Mistakes
1. Uploading Oversized Images
Problem: Uploading 5000x4000px camera originals (4-10MB each).
Impact: Slower editor experience, increased storage usage. While Wix resizes for delivery, the upload and processing takes longer.
Solution: Resize to 1920px on the longest edge before uploading.
# Batch resize all images in a folder
magick mogrify -resize "1920x1920>" -quality 85 -strip *.jpg
2. Too Many Gallery Images on One Page
Problem: Placing 100+ images in a single gallery on one page.
Impact: Even with lazy loading, the browser needs to process DOM nodes for all images. Memory usage spikes on mobile devices.
Solution:
- Limit galleries to 30-50 images per page
- Use pagination or “Load More” functionality
- Split large galleries across multiple pages or sections
3. Not Setting Focal Points
Problem: Leaving focal points at default (center) for images where the subject is off-center.
Impact: Heads get cropped off in mobile views, products are partially hidden in card layouts.
Solution: Set focal points immediately after uploading, especially for:
- Portrait/headshot photos (focus on face)
- Product images with off-center subjects
- Landscape photos with key elements at edges
4. Using PNG for Photographs
Problem: Uploading photographic images as PNG files.
Impact: PNG files of photographs are 3-5x larger than equivalent JPEG files with no visible quality benefit.
Solution: Use JPEG for photographs, PNG only for:
- Images requiring transparency
- Graphics with text or sharp edges
- Screenshots and UI captures
5. Ignoring Mobile Preview
Problem: Optimizing images for desktop only, never checking mobile appearance.
Impact: Cropped subjects, unreadable text overlays, slow mobile loading.
Solution: Always check the mobile preview before publishing. Pay special attention to:
- Hero images (heavy cropping on narrow screens)
- Text overlays on images (font size and positioning)
- Gallery layouts (column count changes)
6. Using Image Backgrounds for Content Images
Problem: Placing important images as section backgrounds instead of image elements.
Impact: Background images do not receive alt text, are not indexable by search engines, and cannot be saved by visitors.
Solution: Use background images only for decorative purposes. Use image elements for any content that conveys information.
7. Duplicate Images at Different Sizes
Problem: Uploading multiple manually-resized versions of the same image.
Impact: Wasted storage, increased management complexity. Wix already generates multiple sizes automatically.
Solution: Upload one high-quality version at recommended dimensions. Let Wix handle the resizing.
Wix vs External CDN
When Wix’s Built-In CDN Is Sufficient
Wix’s CDN handles standard image delivery well:
- Automatic WebP/AVIF conversion
- Global edge caching
- Responsive image generation
- Adequate for most websites
When to Use an External CDN
Consider an external CDN like Sirv alongside Wix when you need:
| Feature | Wix Built-in | Sirv CDN |
|---|---|---|
| Basic image delivery | Yes | Yes |
| WebP/AVIF conversion | Yes | Yes |
| 360-degree spin views | No | Yes |
| Deep zoom (high-res pan) | No | Yes |
| Smart cropping (AI) | Limited | Advanced |
| Custom watermarking | No | Yes |
| Image profiles (presets) | No | Yes |
| Real-time transformations | Limited | Extensive |
| Video optimization | Limited | Yes |
| Batch AI processing | No | Yes (via Sirv AI Studio) |
Integrating Sirv with Wix
You can use Sirv for advanced image features while keeping your Wix site:
Using Sirv images in Wix HTML components:
<!-- Embed in Wix HTML iframe component -->
<div class="sirv-container">
  <!-- Basic optimized image -->
  <img
    src="https://demo.sirv.com/example.jpg?w=800&q=80&format=optimal"
    alt="Product image"
    loading="lazy"
  />

  <!-- 360 spin view -->
  <div class="Sirv" data-src="https://demo.sirv.com/Products/spinner.spin"></div>
  <script src="https://scripts.sirv.com/sirvjs/v3/sirv.js"></script>

  <!-- Deep zoom image -->
  <div class="Sirv" data-src="https://demo.sirv.com/example.jpg?zoom=true"></div>
</div>
Using Sirv via Velo for dynamic images:
// Build Sirv URLs for advanced transformations
function getSirvUrl(imagePath, options = {}) {
  const params = new URLSearchParams();
  if (options.width) params.set('w', options.width);
  if (options.height) params.set('h', options.height);
  if (options.quality) params.set('q', options.quality);
  params.set('format', 'optimal');

  return `https://youraccount.sirv.com/${imagePath}?${params.toString()}`;
}

// Use for product images with smart cropping
const productUrl = getSirvUrl('products/bag.jpg', {
  width: 800,
  height: 800,
  quality: 80
});
Batch Processing with Sirv AI Studio
For large-scale image preparation before uploading to Wix, Sirv AI Studio offers batch processing:
- Background removal: Remove backgrounds from product photos in bulk
- Background replacement: Add consistent backgrounds across product lines
- Smart cropping: AI-powered cropping for consistent compositions
- Batch resize: Prepare images at exact Wix-recommended dimensions
This is particularly useful for e-commerce sites with hundreds of product images that need consistent treatment before uploading to Wix.
Wix Stores (E-commerce) Image Optimization
Product Image Requirements
| Image Type | Recommended Size | Notes |
|---|---|---|
| Main product | 1600x1600 | Square for consistent grid display |
| Additional angles | 1600x1600 | Maintain consistent size and style |
| Zoom detail | 2000x2000 | Higher resolution for zoom feature |
| Product variant | 1200x1200 | Each color/option gets its own image |
| Category banner | 1920x600 | Wide format for category headers |
Product Photography Tips for Wix
Consistent backgrounds:
- Use white or light gray for most products
- Maintain consistent lighting across all products
- Consider Sirv AI Studio for batch background removal
Multiple angles:
- Front, back, side, and detail shots
- Aim for 4-6 images per product
- Include lifestyle/in-use shots
Preparing product images:
# Standardize product images to square with white background
magick input.jpg -resize 1400x1400 -gravity center \
  -background white -extent 1600x1600 \
  -quality 85 -strip output.jpg

# Batch process a product shoot
for file in raw-products/*.jpg; do
  filename=$(basename "$file")
  magick "$file" -resize 1400x1400 -gravity center \
    -background white -extent 1600x1600 \
    -quality 85 -strip "processed/$filename"
done
Wix Blog Image Optimization
Featured Images
Blog featured images appear in:
- Blog feed/listing pages
- Social media shares
- RSS feeds
- Related posts widgets
Specifications: 1200x630 (matches OG image requirements)
In-Post Image Best Practices
| Placement | Recommended Width | Aspect Ratio |
|---|---|---|
| Full-width | 1200px | Any |
| With text wrap | 600px | 4:3 or 3:2 |
| Side-by-side | 600px each | Same ratio |
| Hero/cover | 1200x630 | 1.91:1 |
Blog Image SEO Checklist
- Descriptive filename before upload
- Alt text on every image
- Relevant caption when appropriate
- Featured image set for social sharing
- Images match content topic for search relevance
- Compressed to under 200KB for inline images
- Proper aspect ratios for feed thumbnails
Summary
Quick Reference Table
| Image Type | Dimensions | Format | Quality | File Size Target |
|---|---|---|---|---|
| Hero/Banner | 1920x1080 | JPEG | 80-85% | Under 500KB |
| Blog featured | 1200x630 | JPEG | 80% | Under 250KB |
| Blog inline | 1000x750 | JPEG | 80% | Under 200KB |
| Gallery | 1600x1200 | JPEG | 82% | Under 300KB |
| Product | 1600x1600 | JPEG | 85% | Under 300KB |
| Logo | 500x200 | PNG/SVG | 100% | Under 50KB |
| Favicon | 192x192 | PNG | 100% | Under 20KB |
| Social (OG) | 1200x630 | JPEG | 85% | Under 200KB |
| Icon | 500x500 | PNG/SVG | 100% | Under 30KB |
Optimization Checklist
- Resize images to recommended dimensions before upload
- Use JPEG for photographs, PNG for transparency, SVG for icons/logos
- Export in sRGB color space
- Strip metadata before upload
- Set focal points on all hero and gallery images
- Add descriptive alt text to every informative image
- Name files descriptively before uploading
- Set image quality to 80% in Wix settings
- Limit galleries to 30-50 images per page
- Test mobile preview for all pages with images
- Check Wix Site Speed dashboard after publishing
- Run Lighthouse audits on key pages
- Use Wix image elements instead of background images for content
- Set social sharing (OG) images for all important pages
- Consider Sirv for 360 spins, deep zoom, or batch AI processing
Platform Constraints to Accept
Wix handles certain things automatically that you cannot override:
- Compression algorithms and output quality pipeline
- CDN caching rules and TTL values
- WebP/AVIF conversion behavior
- Lazy loading implementation details
- Image URL structure and hashing
Work within the system: Focus on what you can control - upload quality, dimensions, focal points, alt text, and page structure. Let Wix handle the delivery optimization, and supplement with external tools like Sirv when you need capabilities beyond what Wix offers natively.